Regular grooming isn’t just about keeping your indoor cat looking good—it’s an essential part of health care. While cats are famously fastidious self-groomers, they need your help to stay truly clean, comfortable, and healthy. Proper grooming prevents hairballs, reduces shedding, allows early detection of health issues, and strengthens your bond. Let’s cover everything from daily brushing to the occasionally dreaded nail trim.
Why Indoor Cats Need Regular Grooming
You might think indoor cats can handle their own grooming, and to some extent, they do. But your cat’s tongue can’t reach everywhere, can’t trim nails, and can’t check for early signs of health problems.
Benefits of regular grooming:
- Reduces hairballs – Removing loose fur before your cat ingests it
- Controls shedding – Less fur on furniture, clothes, and floors
- Prevents mats – Especially important for long-haired cats
- Distributes natural oils – Keeps coat shiny and skin healthy
- Early health detection – You’ll notice lumps, bumps, fleas, or skin issues
- Bonding time – Many cats come to enjoy grooming sessions
- Reduces allergies – Less dander and saliva-coated fur in your home
Indoor cats shed year-round (unlike outdoor cats with seasonal cycles), so consistent grooming is key.
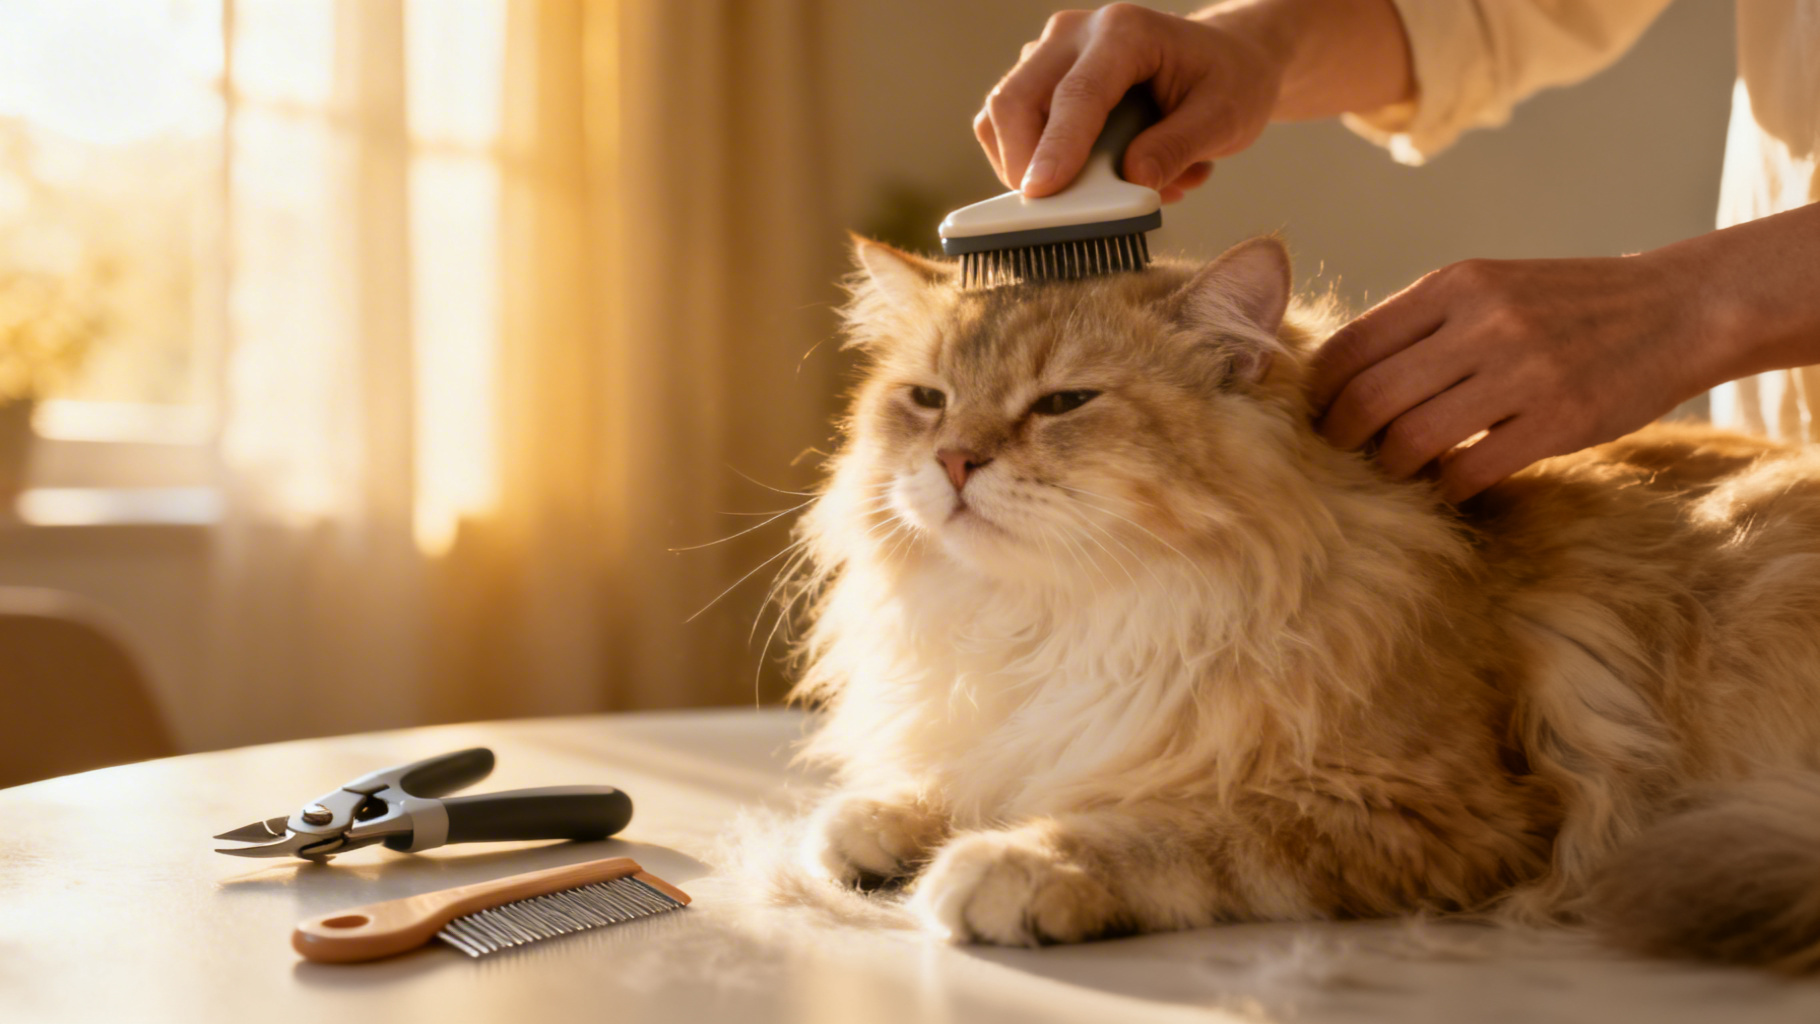
Brushing Basics: The Foundation of Cat Grooming
How Often Should You Brush Your Cat?
Short-haired cats: 1-2 times per week (daily during shedding season)
Long-haired cats: Daily to prevent mats
Senior cats: Daily (they may struggle to groom themselves)
Choosing the Right Brush
Different coat types require different tools.
For short-haired cats:
- Bristle brush – Distributes oils and removes loose fur
- Rubber curry brush – Massages and removes dead hair (cats often love these)
- Grooming glove – Lets you pet and brush simultaneously
- Fine-toothed comb – For finishing touches
For long-haired cats:
- Wide-toothed comb – Works through tangles gently
- Slicker brush – Removes loose undercoat and prevents mats
- Mat splitter or mat rake – For removing stubborn mats (use carefully)
- Undercoat rake – Reaches dead undercoat hair
- Finishing comb – Makes coat smooth and shiny
For all cats during heavy shedding:
- Deshedding tool (like FURminator) – Removes massive amounts of loose undercoat. Use sparingly (once a week max) to avoid over-brushing
Brushing Technique
Step 1: Choose the right time
- Brush when your cat is relaxed (after play or feeding)
- Avoid brushing when your cat is energetic or cranky
- Start with short sessions and build up tolerance
Step 2: Start with petting
- Begin by petting your cat normally
- Gradually introduce the brush
- Let your cat sniff and investigate the brush
Step 3: Brush in the direction of fur growth
- Start with areas your cat enjoys being touched (head, chin, cheeks)
- Work your way to the back, sides, and tail
- Use gentle, long strokes
- Talk soothingly as you brush
Step 4: Pay attention to problem areas
- Behind ears – Mats form easily here
- Under arms/legs – Often neglected by cats during self-grooming
- Belly – Many cats are sensitive here; proceed with caution
- Base of tail – Some cats love this; others hate it
- Hindquarters – Senior or overweight cats can’t reach here well
Step 5: Watch for signs your cat has had enough
- Tail lashing or thumping
- Ears flattening back
- Skin twitching
- Trying to walk away or swatting
- Vocalizing (irritated meows or growls)
If your cat shows these signs, stop and try again later. Forcing the issue creates negative associations.
Dealing with Mats and Tangles
Mats are clumps of tangled fur that can pull on skin, cause pain, and hide skin problems.
For small mats:
- Hold the mat at the base near the skin to avoid pulling
- Gently work through with a wide-toothed comb or your fingers
- Use a mat splitter if needed (carefully!)
- Apply a small amount of cornstarch to help loosen the mat
For large or severe mats:
- Don’t try to cut them out yourself—you can easily cut your cat’s skin
- Take your cat to a groomer or veterinarian
- Some cats need to be sedated for mat removal
Prevention is easier than removal: Daily brushing prevents mats from forming, especially in long-haired cats.
Nail Trimming: A Necessary Task
Indoor cats’ nails don’t wear down naturally like outdoor cats’ nails do. Overgrown nails can curl into paw pads, snag on fabric, and cause injury.
How Often to Trim Nails
Adult cats: Every 2-4 weeks
Senior cats: Every 2-3 weeks (nails grow faster and may become brittle)
Kittens: Every 2-3 weeks (helps them get used to the process)
What You’ll Need
- Cat nail clippers – Scissor-style or guillotine-style (choose what’s comfortable for you)
- Styptic powder – Stops bleeding if you accidentally cut the quick
- Treats – For positive reinforcement
- Good lighting – To see the quick clearly
Nail Trimming Technique
Step 1: Get your cat comfortable
- Start by handling your cat’s paws regularly (even when not trimming)
- Press gently on paw pads to extend the claws
- Reward with treats for tolerating paw handling
- Practice this for several days before attempting your first trim
Step 2: Choose the right time and position
- Trim nails when your cat is sleepy or relaxed
- Sit with your cat in your lap or on a table
- For difficult cats, wrap in a towel (burrito-style) and expose one paw at a time
- Some people find it easier to trim nails while the cat is sleeping
Step 3: Identify the quick
- The quick is the pink part inside the nail containing blood vessels and nerves
- In light-colored nails, it’s easy to see
- In dark nails, look from the side—the quick appears as a dark core
- Never cut the quick—it’s painful and will bleed
Step 4: Make the cut
- Hold your cat’s paw gently but firmly
- Press the paw pad to extend the claw
- Position clippers perpendicular to the nail (straight across, not at an angle)
- Cut 2-3mm away from the quick—just the sharp tip
- Use a quick, decisive motion (hesitation can cause the nail to split)
Step 5: Work one paw at a time
- You don’t have to do all four paws in one session
- If your cat gets stressed, stop and finish later
- Always end on a positive note with treats and praise
Step 6: Don’t forget the dewclaws
- These are the “thumbs” on the inner side of the front legs
- They don’t touch the ground and won’t wear down naturally
- Left untrimmed, they can grow in a circle and pierce the paw pad
What If You Cut the Quick?
Accidents happen. If you cut the quick:
- Stay calm (your cat will pick up on your anxiety)
- Apply styptic powder immediately
- If no styptic powder, use flour or cornstarch
- Apply gentle pressure with gauze for 30 seconds
- Keep your cat calm and confined for 30 minutes to prevent re-bleeding
- The nail will be sore—your cat may limp briefly
One mistake doesn’t mean you’re bad at nail trimming. It happens to everyone eventually.
Alternatives to Nail Trimming
If your cat absolutely won’t tolerate nail trimming:
- Nail caps (Soft Paws) – Glue-on covers that last 4-6 weeks
- Professional grooming – Groomers or vets can trim nails
- Scratching posts – Help with natural nail maintenance (but don’t replace trimming)
Bathing: Usually Unnecessary, Occasionally Essential
Most indoor cats never need baths. They’re self-cleaning and hate water. However, there are exceptions.
When Bathing IS Necessary
- They got into something toxic – Bathe immediately if they have something harmful on their fur
- Flea infestation – Flea baths may be recommended
- Severe diarrhea – When a cat can’t clean themselves adequately
- Elderly or obese cats – Who can no longer groom themselves
- Hairless or low-hair breeds (Sphynx, Devon Rex) – They need regular baths to remove skin oils
- Medical conditions – Some skin conditions require medicated baths
- Show cats – Require baths before shows
How to Bathe a Cat (When You Must)
Preparation:
- Trim nails first (for your safety)
- Brush thoroughly to remove loose fur and mats
- Place a rubber mat in the tub or sink for traction
- Use lukewarm water (test temperature on your wrist)
- Have all supplies ready: cat shampoo, towels, cup for rinsing
- Close the bathroom door (prevent escape)
Bathing process:
- Fill sink or tub with 3-4 inches of water BEFORE bringing in your cat
- Place cotton balls gently in your cat’s ears to prevent water entry
- Slowly lower your cat into the water (expect protest)
- Wet fur with a cup or handheld sprayer (avoid face and ears)
- Apply cat-specific shampoo (NEVER use human shampoo or dog shampoo)
- Lather gently, talking soothingly
- Rinse thoroughly—leftover shampoo causes skin irritation
- For the face, use a damp washcloth only (no shampoo)
Drying:
- Wrap your cat in a towel immediately
- Pat dry gently (don’t rub)
- Use multiple towels if needed
- Keep your cat in a warm room until fully dry
- Most cats hate blow dryers, but if yours tolerates it, use the lowest, coolest setting from a distance
Important bathing rules:
- Never leave your cat unattended in water
- Hold your cat securely but gently—wear long sleeves
- Never submerge your cat’s head
- Watch water temperature throughout
- Be prepared for your cat to be upset with you afterward (they’ll forgive you eventually)
Dental Care: The Often-Neglected Essential
Dental disease affects over 70% of cats by age three. It’s painful, causes bad breath, and can lead to serious health problems including heart and kidney disease.
Signs of Dental Problems
- Bad breath (more than normal “cat breath”)
- Drooling or pawing at mouth
- Difficulty eating or dropping food
- Preference for soft food
- Red or swollen gums
- Yellow or brown teeth
- Loose or missing teeth
- Behavioral changes (irritability from pain)
Home Dental Care
Tooth brushing (the gold standard):
- Frequency: Daily is ideal; 3-4 times per week is acceptable
- Supplies: Cat toothbrush or finger brush, cat toothpaste (NEVER human toothpaste—xylitol is toxic)
- Training process:
- Week 1: Let your cat lick toothpaste off your finger
- Week 2: Rub paste on teeth with your finger
- Week 3: Introduce the toothbrush with paste
- Week 4+: Actual brushing
- Technique: Focus on the outer surface of teeth (the side facing the cheek), especially the back molars where tartar builds up most. You don’t need to brush inner surfaces—the cat’s tongue handles that.
If your cat won’t tolerate brushing:
- Dental treats – Some are proven to reduce tartar (look for VOHC seal of approval)
- Dental wipes – Easier than brushing, less effective but better than nothing
- Water additives – Add to drinking water to reduce bacteria
- Dental toys – Chew toys designed to clean teeth
- Dental diets – Some prescription foods are formulated to reduce tartar
Professional Dental Cleanings
Even with home care, cats need professional cleanings under anesthesia. These should be done:
- As recommended by your vet (usually every 1-3 years)
- More frequently if your cat is prone to dental disease
- Immediately if you notice signs of dental problems
Professional cleanings clean below the gum line where home care can’t reach and allow for X-rays to identify problems under the surface.
Ear Cleaning: When and How
Healthy cat ears are self-cleaning and usually don’t need intervention. However, some situations require ear cleaning.
When to Clean Ears
- Visible dirt or wax buildup
- As directed by your vet for ear infections or mites
- Hairless or large-eared breeds may need more frequent cleaning
How to Clean Cat Ears
- Use a vet-approved ear cleaning solution (never water, alcohol, or hydrogen peroxide)
- Hold your cat’s head steady
- Fill the ear canal with cleaning solution
- Massage the base of the ear for 20-30 seconds
- Let your cat shake their head
- Wipe out visible debris with a cotton ball or gauze
- NEVER insert cotton swabs into the ear canal
Signs of Ear Problems (See Your Vet)
- Red, swollen, or painful ears
- Excessive scratching or head shaking
- Black, coffee-ground-like debris (ear mites)
- Foul odor
- Discharge
- Loss of balance or head tilt
Eye Care
Most cats don’t need routine eye cleaning, but some breeds (like Persians with flat faces) accumulate discharge.
Normal Eye Care
- Wipe away eye discharge with a soft, damp cloth
- Use a separate section of cloth for each eye (prevent cross-contamination)
- Wipe from the inner corner outward
- Use only water or vet-recommended eye wipes
When to See the Vet
- Excessive tearing or discharge
- Red, swollen, or cloudy eyes
- Squinting or keeping eye closed
- Pawing at eyes
- Green or yellow discharge
- Any eye injury
Making Grooming a Positive Experience
The key to successful grooming is creating positive associations.
Tips for success:
- Start young: Kittens are easier to train to tolerate grooming
- Keep sessions short: 5-10 minutes is plenty, especially at first
- Use treats: Reward before, during, and after grooming
- Stay calm: Your cat picks up on your stress
- Stop if stressed: Forcing the issue makes future sessions harder
- Create routine: Groom at the same time and place for predictability
- Make it comfortable: Use a non-slip surface, good lighting, comfortable temperature
- Talk soothingly: Your voice reassures your cat
- Be patient: Some cats take time to accept grooming
When to Seek Professional Help
Some grooming tasks are best left to professionals:
- Severe matting requiring shaving
- Cats who become aggressive during grooming
- Specialized breed grooming (like lion cuts)
- If you’re uncomfortable with any grooming task
- Senior cats who may need extra gentle handling
Professional groomers and veterinary staff are trained to handle difficult situations safely.
Grooming Schedule: Your At-a-Glance Guide
Daily:
- Check for obvious issues during petting
- Brush long-haired cats
- Tooth brushing (ideal)
2-3 times per week:
- Brush short-haired cats
- Tooth brushing (minimum)
Every 2-4 weeks:
- Trim nails
- Clean ears if needed
As needed:
- Baths (rarely)
- Eye cleaning
- Professional grooming
1-3 times per year:
- Professional dental cleaning
Final Thoughts
Grooming your indoor cat isn’t just about aesthetics—it’s preventive health care that allows you to catch problems early, keeps your cat comfortable, and strengthens your bond. While it may seem overwhelming at first, grooming becomes routine with practice.
Start slowly, be patient with both your cat and yourself, and remember that every cat is different. What works for one may not work for another. The goal is finding a grooming routine that keeps your cat healthy and happy while being sustainable for you.
Your cat depends on you for care they can’t provide themselves. By committing to regular grooming, you’re giving your feline friend the gift of comfort, health, and a longer, happier life together.